Reading Time: 10 minutes
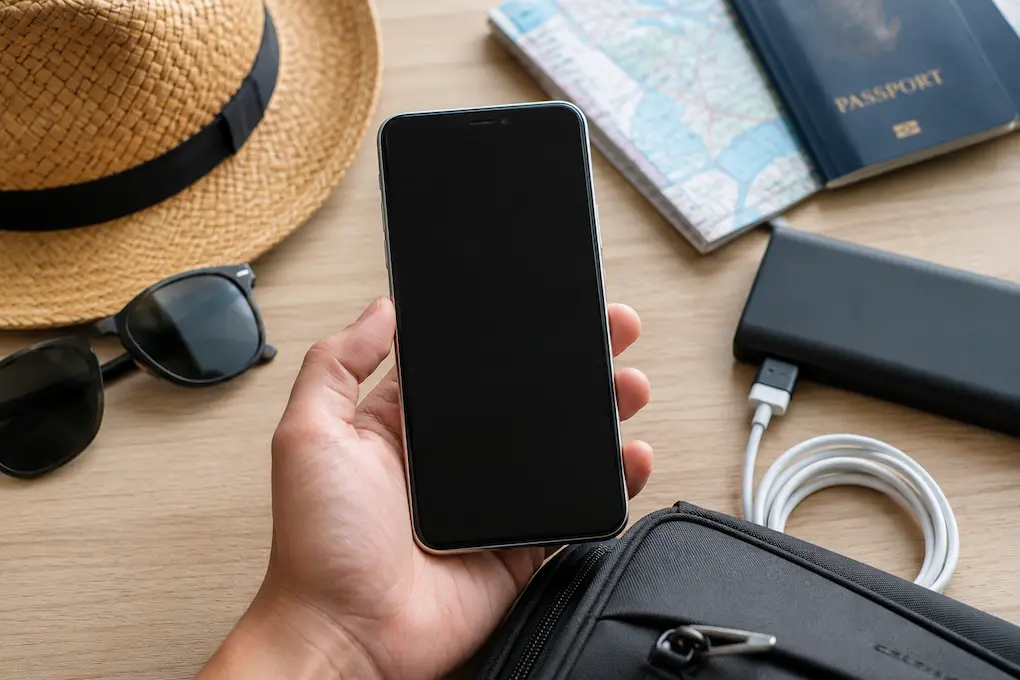
Three summers ago, I landed in Goa with a dead phone, no offline maps, and a roaming bill that cost more than my flight ticket. I had assumed that “my phone works everywhere” and paid dearly for that assumption. That trip taught me that travel phone prep isn’t optional — it’s the difference between a smooth trip and a series of expensive, stressful problems.
This guide is what I do before every trip now. Not theory. Not generic advice. Just the checklist I run through two days before I leave, based on mistakes that actually happened to me. Whether you’re driving to a hill station or flying overseas, these steps will keep your phone useful, secure, and affordable.
✈️ Start This 48 Hours Before You Leave
Don’t wait until the night before. Some steps — like downloading offline maps or contacting your carrier about roaming — need time to process. I once tried to enable international roaming two hours before a flight. The carrier’s system took six hours to activate. I landed in Dubai with no data and had to buy an overpriced airport SIM.
Step 1: Audit Your Data Plan (Do This First)
Your regular data plan probably doesn’t cover travel the way you think. Before you do anything else, understand what you’re paying for.
Domestic Travel Within India
Most Indian carriers don’t charge extra for domestic roaming anymore, but data speeds can drop. Jio, Airtel, and Vi generally work nationwide, but check if your plan has any “fair usage” limits that throttle speeds after a certain threshold. I hit my 2GB daily limit on day three of a Kerala road trip and spent the rest of the day on 2G speeds. Not fun when you’re trying to find a restaurant.
International Travel
This is where people get destroyed by bills. International roaming data can cost ₹500–₹1,000 per day without a plan. Your options:
| Option | Best For | My Experience |
|---|---|---|
| International roaming pack from carrier | Short trips (1–5 days), need your number active | Airtel’s ₹649/day pack worked well in Thailand. Activation took 4 hours. Call your carrier 2 days early. |
| Local SIM at destination | Longer trips, heavy data users, budget travelers | Bought a €15 SIM in Paris with 20GB. Cheaper than roaming, but you get a new number. WhatsApp still works on Wi-Fi. |
| eSIM from services like Airalo or Holafly | Convenience, keep your number, instant activation | Used Airalo in Japan. €18 for 10GB/30 days. Activated before landing. Seamless. My iPhone 15 supported dual eSIM. |
| Wi-Fi only + offline prep | Budget travelers, short city trips with good Wi-Fi | Did this in Singapore. Hotel and mall Wi-Fi was excellent. Downloaded maps and translation packs before leaving. |
My rule: if the trip is under 5 days and I need my regular number for calls, I use a carrier roaming pack. If it’s longer than a week or I’m a heavy data user, I get a local SIM or eSIM. For city trips with reliable Wi-Fi, I go offline-only and save money entirely.
One critical detail: turn off data roaming in your phone settings before you fly, then turn it back on only after you’ve activated your chosen plan. I forgot this once and my phone connected to a network in transit. A 2MB background sync cost me ₹340. Two megabytes. That’s a WhatsApp voice note.
Step 2: Download Offline Maps (Essential)
Google Maps offline is the most underused travel feature. It works without any data connection. I’ve navigated through old town areas in Udaipur and mountain roads in Himachal with zero signal, just because I downloaded the map beforehand.
How to download: Open Google Maps → Tap your profile picture → Offline maps → Select your own map → Zoom to the area you need → Tap Download. Do this for every city or region you’ll visit. The download can be 50–200MB per city, so use Wi-Fi.
Pro tip: Download a larger area than you think you need. I downloaded “Jaipur city center” for a trip, then drove to a fort 30km outside the city. No map. Now I download the entire district or state outline, not just the city.
Also download offline maps for your transit apps if they support it. Delhi Metro’s app works offline for route planning. Uber doesn’t work offline, but knowing your hotel’s location from an offline map means you can direct a local taxi or auto driver even without data.
Step 3: Secure Your Phone for Travel
Tourists are targets. Not just for pickpockets, but for digital scams, fake Wi-Fi networks, and compromised charging stations. A few minutes of prep significantly reduces your risk.
Update Everything Before You Leave
Security patches often fix vulnerabilities that attackers exploit on public networks. Update your phone’s operating system, all apps, and your password manager the day before you travel. Don’t update on hotel Wi-Fi — those networks are often slow and potentially compromised.
I update on my home Wi-Fi, then restart the phone to ensure everything applied correctly. Last year, I skipped an iOS update before a trip to Bali. A known Safari vulnerability was actively exploited on hotel networks there. I got lucky, but I won’t skip again.
Enable Find My Device (And Test It)
If your phone is stolen, this is your only recovery tool. Make sure it’s active and that you can locate it from another device.
- Android: Settings > Security > Find My Device. Ensure it’s on and location services are enabled.
- iPhone: Settings > [Your Name] > Find My > Find My iPhone. Enable all three toggles.
Test it from your tablet or a family member’s phone before you leave. I test mine monthly, but especially before travel. If it doesn’t work, you have time to fix it at home — not when you’re panicking in a foreign city.
Set Up a PIN for Your SIM
Most people don’t know this exists. A SIM PIN locks your SIM card so if someone steals your phone and removes the SIM, they can’t use it in another device. It’s a small barrier that buys you time to contact your carrier and block the number.
Settings > Security > SIM card lock (Android) or Settings > Cellular > SIM PIN (iPhone). The default is often 1234 or 0000 — change it to something you’ll remember but isn’t obvious. Write it down in your luggage, not your phone. If you enter it wrong three times, the SIM locks permanently and you need a PUK code from your carrier.
I learned about SIM PINs after a friend had his phone stolen in Barcelona. The thief removed the SIM, put it in another phone, and used it to receive two-factor authentication codes. They accessed his email and bank accounts within an hour. A SIM PIN would have stopped that.
⚠️ Public Wi-Fi Warning: The “Juice Jacking” Risk
Never use public USB charging stations at airports, hotels, or cafes without a data blocker (also called a USB condom). These devices look like normal chargers but can steal data or install malware on your phone. I carry a small power bank and my own wall adapter. If I must use a public USB port, I use a data blocker — a $5 adapter that allows charging but blocks data transfer. My guide on staying safe on public Wi-Fi networks covers more digital security risks while traveling.
Step 4: Maximize Battery Life on the Road
Travel days are battery killers. Navigation, camera use, searching for restaurants, translation apps, and spotty signal areas all drain power faster than normal. Here’s how I manage it.
Before You Leave: Battery Health Check
Check your battery’s maximum capacity. If it’s below 80%, consider getting it replaced before a long trip. A degraded battery dies faster and performs worse in temperature extremes.
- iPhone: Settings > Battery > Battery Health & Charging. Look at “Maximum Capacity.”
- Android: Settings > Battery > Battery Health (Samsung) or use a third-party app like AccuBattery for other brands.
My iPhone 15 was at 89% capacity before a 10-day trip last year. I debated replacing it. On day 6, I was hunting for power outlets by 4 PM. This year, I replaced the battery before my summer trip. Worth every rupee.
Travel Day Battery Settings
These aren’t my daily settings — I only use them on travel days when I need maximum endurance:
| Setting | What to Change | Battery Impact |
|---|---|---|
| Brightness | Auto-brightness on, but set manual max to 60% | High — screen is the biggest battery drain |
| Location services | Set to “While Using” for all apps except Maps | Medium — constant GPS polling drains fast |
| Background app refresh | Turn off for all non-essential apps | Medium — prevents apps from syncing constantly |
| Bluetooth | Off unless using headphones or tracker | Low — but every bit helps on long days |
| 5G / Mobile data | Switch to 4G/LTE if 5G signal is weak | High — weak 5G makes phone hunt for signal |
| Low Power Mode | Enable at 50% instead of waiting for 20% | High — extends life by 2–3 hours typically |
On my last trip to Rajasthan, I enabled Low Power Mode at 50% every day. My phone lasted from 7 AM to 11 PM with navigation, photos, and occasional hotspot use. Without it, I’d have been dead by dinner.
Carry the Right Power Gear
Your charging setup matters. Here’s what I pack:
- 20,000mAh power bank: Charges my phone 4–5 times. Anker and Mi make reliable ones. Avoid cheap unknown brands — they fail when you need them most.
- Dual USB wall adapter: Charges phone and power bank simultaneously at night. Hotel rooms often have one convenient outlet.
- Short USB-C cable: Less tangling, faster charging than long cables due to lower resistance.
- Universal travel adapter: If traveling internationally. Check the plug type for your destination before you leave.
I don’t carry wireless chargers for travel. They’re slower, bulkier, and less reliable than a good cable. Speed matters when you have 30 minutes at a cafe before your next stop.
Step 5: Prep Your Apps for Offline Use
Even with a data plan, you’ll hit dead zones. Mountains, rural roads, basements, and some hotel rooms have no signal. Offline-ready apps keep you functional.
Essential Offline Apps and Content
- Google Translate: Download the language pack for your destination. Works for camera translation (menus, signs) and voice conversations without data. I used this in Vietnam to read restaurant menus — life-changing.
- Spotify/YouTube Music: Download playlists for flights and long drives. I keep a 5-hour “travel mix” updated before every trip.
- Netflix/Prime Video: Download a few episodes for airport waits and rainy afternoons. Hotel Wi-Fi often can’t stream reliably.
- Kindle or reading app: Load books before you leave. Lighter than physical books and works offline.
- Banking apps: Ensure they’re updated and you remember all passwords. Some banks block logins from new locations for security — contact them before travel if needed.
Also screenshot important confirmations: flight tickets, hotel bookings, train reservations, and emergency contacts. Screenshots work without any signal or app. I keep a folder called “Travel” in my gallery with all trip screenshots. It’s my backup when apps fail or data dies.
Step 6: The Night Before Departure Checklist
I run through this list every time. It takes 15 minutes and prevents 90% of travel phone problems.
📋 My Pre-Travel Phone Checklist
✓ Data plan confirmed and activated
✓ Offline maps downloaded for all destinations
✓ Phone fully charged + power bank charged
✓ Find My Device tested from another device
✓ SIM PIN enabled
✓ All apps updated
✓ Translation packs downloaded
✓ Entertainment downloaded for offline
✓ Screenshots of all bookings saved
✓ Emergency contacts written down (not just in phone)
✓ Power bank, cable, and adapter packed in carry-on
✓ Data roaming turned OFF until I activate my travel plan
Print this checklist or save it as a note. I have it in Google Keep and check each item off. The peace of mind is worth more than the 15 minutes it takes.
What to Do If Something Goes Wrong
Despite preparation, problems happen. Here’s how I handle the common ones.
Phone Stolen or Lost
Act fast. Every minute matters.
- Use Find My Device from another phone or computer to locate, lock, or erase it.
- Call your carrier immediately to block the SIM and number.
- Change passwords for email, banking, and social media from another device.
- File a police report if needed for insurance claims.
- If you have phone insurance, contact them within 24 hours.
I had a close call in Mumbai. Left my phone on a cafe table, walked 50 meters before realizing. Ran back — still there, but my heart was pounding for an hour. Now I do a “phone, wallet, keys” check every time I stand up from a seat in public.
Water Damage
Beach trips, poolside, monsoon rains. Phones and water don’t mix.
If your phone gets wet: turn it off immediately, don’t charge it, don’t use rice (it doesn’t work well and can get into ports), and place it in a dry area with airflow. Silica gel packets work better than rice if you have them. Wait at least 24 hours before turning it on. If it doesn’t start, take it to a service center.
I use a waterproof phone pouch for beach and pool days. ₹200 online, and it has saved my phone twice. Cheap insurance.
Broken Screen
Travel is hard on phones. Drops, bumps, pressure in bags.
Before you travel, know where authorized service centers are in your destination city. Samsung, Apple, and Xiaomi have service locators on their websites. For international travel, Apple has stores in most major cities. Android brands vary — research before you leave.
A cracked screen doesn’t always mean a dead phone. If the touch still works, you can often use it carefully until you get home. If the touch is broken, a USB mouse connected via OTG adapter can help you back up data before repair. I’ve done this twice — it looks ridiculous but it works.
Final Thoughts: Travel Light, Travel Smart
Your phone is your most useful travel tool — navigation, translation, camera, payment method, emergency contact, entertainment. But it’s also your biggest vulnerability if something goes wrong. A little preparation transforms it from a source of anxiety into a reliable companion.
I don’t travel with a laptop anymore. My phone handles everything — emails, photo editing, banking, booking changes, navigation. But that convenience depends on the prep work I do before I leave. The 30 minutes I spend on this checklist saves me hours of stress and potentially thousands of rupees in roaming bills or replacement costs.
This summer, whether you’re heading to the mountains, the beach, or a new country, give your phone the same attention you give your packing list. It deserves it. And you’ll thank yourself when everything just works.
Frequently Asked Questions
Should I buy travel insurance for my phone?
If your phone is expensive (₹40,000+), yes. Many travel insurance policies cover electronics, but read the fine print. Some have high deductibles or don’t cover “negligence” (like leaving it on a table). I use a dedicated phone insurance plan that covers theft, damage, and water exposure. It costs about ₹200/month and has saved me twice.
Can I use my phone as a hotspot for my laptop or tablet while traveling?
Yes, but it drains battery fast and uses data quickly. A 30-minute video call on laptop via phone hotspot can consume 500MB. If you need regular laptop internet, consider a dedicated travel data plan or local SIM with higher data limits. I use hotspot only for emergency emails and light browsing, not streaming or large downloads.
How do I handle two-factor authentication when traveling?
This is tricky. If your 2FA codes go to SMS and you’re using a local SIM, you won’t receive them. Before traveling, switch to an authenticator app (Google Authenticator, Authy, or Microsoft Authenticator) or a hardware security key. These work without cellular service. I use Authy because it syncs across devices — if I lose my phone, I can still access codes from my tablet.
Is it safe to use hotel Wi-Fi?
Hotel Wi-Fi is convenient but risky. Never access banking or enter passwords on hotel Wi-Fi without a VPN. I use ProtonVPN’s free tier for travel — it’s secure and doesn’t log activity. For sensitive transactions, I use my mobile data instead, even if it costs more. My guide on staying safe on public Wi-Fi networks covers this in more detail with specific VPN recommendations and setup steps.
What should I do with my phone on the beach?
Sand and salt water are phone killers. Use a waterproof pouch, keep it in a sealed plastic bag when not in use, and never leave it in direct sunlight on a towel — overheating can permanently damage the battery. I take photos in the morning and evening, then keep my phone in the hotel safe during peak sun hours. The photos are better in golden light anyway.
How do I save battery when taking lots of photos?
Photos drain battery because the screen stays on and the camera processor works hard. Enable airplane mode when photographing in areas with no signal (your phone wastes power searching for towers). Lower screen brightness to 40%. Close other apps. And consider a camera grip with built-in battery — they extend shooting time significantly. I use one on full-day photography trips.
Related Articles
Continue your travel and tech preparation with these detailed guides from NilansGuide:
- How to Stay Safe on Public Wi-Fi Networks — Deep dive into VPNs, secure browsing, and avoiding common traps on hotel, airport, and cafe Wi-Fi
- Everyday Tips to Save Battery Life on Your Smartphone — Battery optimization techniques for daily use, not just travel
- Essential Mobile Settings You Should Enable Right Now in 2026 — Security settings that complement your travel prep
- How to Back Up Your Phone Data Safely and Easily — Ensure your travel photos and data are protected before you leave
- How to Avoid Phishing Scams on Email and Social Media — Scam awareness for when you’re using unfamiliar networks
- How to Organize Apps and Files for Better Daily Productivity — Clean up your phone before travel so you can find what you need quickly
- How to Free Up Storage Space on Any Smartphone — Make room for travel photos and offline downloads
- How to Use Voice Assistants Like Siri and Google Assistant — Hands-free help when you’re carrying luggage or driving
- How to Track Your Phone’s Battery Usage Efficiently — Identify which apps drain your battery most during travel
- How to Troubleshoot Common Mobile Connectivity Problems Quickly — Fix signal and data issues when you’re away from home
Sources and References
Information in this guide is based on personal travel experience, carrier documentation, and manufacturer guidelines. Key references include:
- Google. (2026). Use Google Maps Offline. Retrieved from https://support.google.com/maps/answer/6291838
- Google. (2026). Google Translate Offline Languages. Retrieved from https://support.google.com/translate/answer/6142468
- Apple Inc. (2026). Use Find My on Your iPhone. Retrieved from https://support.apple.com/guide/iphone/locate-a-device-iph09f1f3d5/ios
- Apple Inc. (2026). Use SIM PIN on iPhone. Retrieved from https://support.apple.com/guide/iphone/lock-your-sim-iph2c3e9979/ios
- Google. (2026). Find, Lock, or Erase a Lost Android Device. Retrieved from https://support.google.com/android/answer/3265955
- Google. (2026). Android Battery Saver and Adaptive Battery. Retrieved from https://support.google.com/android/answer/7665064
- Apple Inc. (2026). Low Power Mode on iPhone. Retrieved from https://support.apple.com/guide/iphone/turn-low-power-mode-on-or-off-iphd00224d96/ios
- Apple Inc. (2026). About Optimized Battery Charging on iPhone. Retrieved from https://support.apple.com/108021
- Airalo. (2026). eSIM Travel Data Plans. Retrieved from https://www.airalo.com
- Proton AG. (2026). ProtonVPN Security Features. Retrieved from https://protonvpn.com
All product names, logos, and brands are property of their respective owners. Use of these names, logos, and brands does not imply endorsement. Carrier plans, pricing, and availability vary by region and change frequently. Verify current offerings with your specific carrier before travel.
About the Author: Nilan is the creator of NilansGuide.com. He writes practical tech guides tested on real devices — no theory, only steps that actually work. Based in India.
Nilan is the founder of NilansGuide.com and has spent the last 6 years helping friends, family, and readers solve everyday tech problems. He tests every tip and tutorial on his own devices — including a Samsung Galaxy S23, iPhone 15, iPad Air, and Windows 11 laptop — before publishing. When he’s not writing step-by-step guides, he’s usually troubleshooting someone’s “why is my storage full again?” question. Nilan believes technology should work for people, not the other way around.