Reading Time: 12 minutes
Last month, my cousin bought her first smartphone in three years. She stared at the box for a solid ten minutes before calling me. “I don’t even know where to start,” she said. That conversation reminded me how overwhelming a new phone can feel — even in 2026, when everything is supposed to be “intuitive.”
I’ve set up dozens of phones for family, friends, and myself over the years. Each time, I learn something new. This guide is what I wish I had when I unboxed my first Android phone back in 2018. No jargon. No assumptions. Just a clear path from box to daily use, with the mistakes I’ve made so you don’t have to repeat them.
💡 Quick Tip Before You Start
Charge your phone to at least 50% before beginning setup. The initial configuration drains battery faster than normal use, and you don’t want your phone dying mid-process. I learned this the hard way when my phone shut down during a software update and I had to start over.
What You’ll Need Before You Begin
Don’t just rip the box open. Gather these items first. It saves you from scrambling around your house halfway through setup.
| Item | Why You Need It | My Note |
|---|---|---|
| Your old phone (if switching) | For data transfer and account verification | Keep it nearby until setup is complete |
| Wi-Fi password | Initial setup requires internet connection | Write it down — typing on a new phone feels awkward at first |
| Google or Apple ID password | Account recovery and app downloads | If you forgot it, reset it now on a computer |
| SIM card ejector tool (or paperclip) | Installing your SIM card | The tool in the box is tiny and easy to lose |
| A comfortable chair and good lighting | Setup takes 30–60 minutes | Seriously. You’ll be reading small text and entering passwords |
Day 1: Unboxing and Initial Setup (30–45 Minutes)
Step 1: Inspect Everything
Before you power on, check the box contents. In 2026, most phones ship with minimal accessories, but verify you have:
- The phone itself (obviously)
- USB-C charging cable
- Power adapter (some brands exclude this now — check!)
- SIM ejector tool
- Quick start guide and warranty card
My Samsung Galaxy S23 came without a charger. I had to use my old one. If your new phone uses a different charging standard than your old one, order a compatible adapter before you start. Nothing kills excitement like realizing you can’t charge your new device.
Step 2: Physical SIM or eSIM?
Here’s where people get stuck. Most 2026 phones support eSIM, but not all carriers do. I prefer physical SIMs for now — they’re easier to swap between phones if something goes wrong.
To install a physical SIM: power off the phone, locate the SIM tray (usually on the side), insert the ejector tool into the small hole, pull out the tray, place the SIM card with the gold contacts facing down, and push the tray back in until it clicks.
If your carrier supports eSIM, you can activate it during software setup. It’s convenient but less flexible. I use eSIM on my iPhone 15 for my personal line and physical SIM for work — dual SIM without the dual SIM hassle.
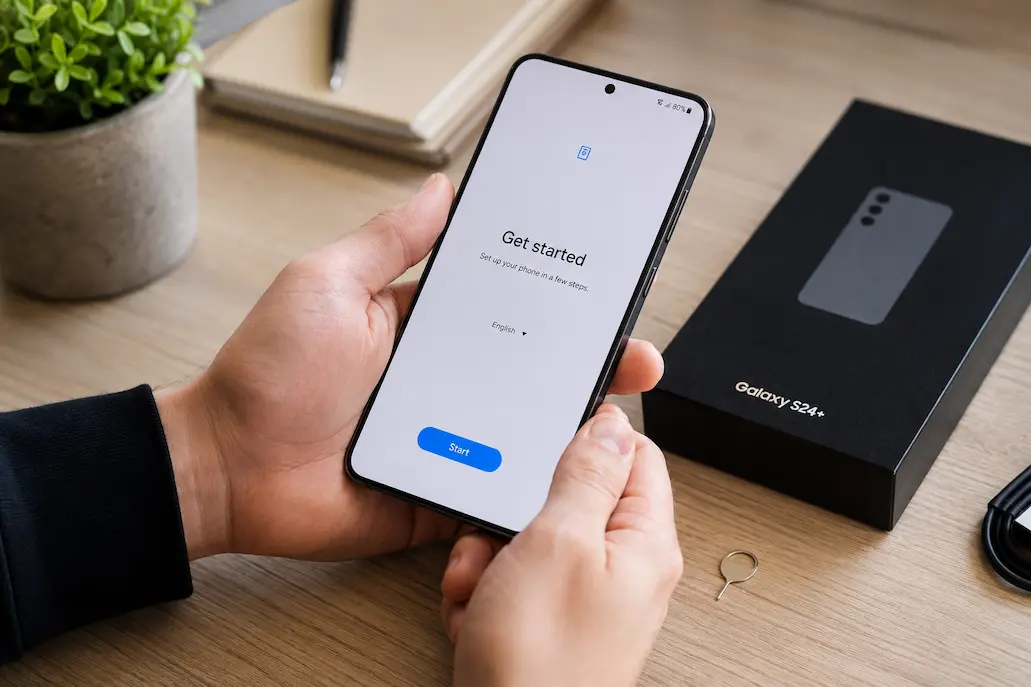
Step 3: Power On and Follow the Prompts
Press and hold the power button. The first boot takes longer than usual — be patient. You’ll see a welcome screen asking you to choose a language. Pick yours, then connect to Wi-Fi.
⚠️ Warning: Don’t Skip the Wi-Fi Step
I once tried to rush through setup using mobile data. The phone downloaded a 2GB system update and burned through my monthly data allowance in ten minutes. Always use Wi-Fi for initial setup. If your home Wi-Fi is slow, consider visiting a friend with fiber or a coffee shop with reliable internet.
Step 4: Transfer Your Data
This is the moment of truth. Your old phone holds years of photos, messages, contacts, and app data. Losing it is not an option.
For Android to Android: Use Google’s built-in “Copy apps and data” feature. During setup, you’ll see a prompt asking if you want to transfer from your old device. Tap “Next,” then use a USB-C cable to connect both phones. The transfer takes 15–40 minutes depending on data size. Keep both phones plugged in — this process drains battery fast.
For iPhone to iPhone: Use Apple’s “Quick Start.” Hold your old iPhone near the new one. A prompt appears asking if you want to set up the new device. Scan the animation on the new phone with your old phone’s camera. Enter your old phone’s passcode, follow the prompts, and choose what to transfer. This works over Wi-Fi and is surprisingly reliable.
For Android to iPhone or iPhone to Android: Use the “Move to iOS” app (Android → iPhone) or Google Drive backup (iPhone → Android). These are less perfect — some app data won’t transfer, and you’ll need to redownload apps manually. I did this switch last year and spent an entire weekend reorganizing everything. Budget extra time.
My detailed guide on transferring data without losing anything covers edge cases and troubleshooting if the transfer fails.
Step 5: Sign In to Your Accounts
You’ll need your Google account (Android) or Apple ID (iPhone). This is not optional — it’s how your phone backs up, downloads apps, and syncs data.
Two-factor authentication (2FA) will trigger here. If you set up 2FA on your old phone, you might get a verification code sent to… your old phone. Have it nearby. I once got locked out of my Google account during setup because my verification codes went to my old phone, which I had already factory reset. Now I use an authenticator app that works across multiple devices.
Day 2: Security and Essential Settings (20–30 Minutes)
Yesterday was about getting your phone functional. Today is about keeping it that way. Security isn’t exciting, but spending twenty minutes now saves you from panic later.
Enable Biometric Authentication
Face recognition and fingerprint sensors are faster and more secure than passwords. Set them up during the initial prompts, or go to Settings > Security > Biometrics later.
Test your fingerprint from different angles. I register the same finger twice — once straight on and once at a slight angle. This improves recognition when I’m holding the phone differently. On my Samsung, I also registered my left thumb because I sometimes unlock the phone with that hand while carrying groceries.
Set Up Find My Device
This is non-negotiable. If you lose your phone, this feature lets you locate, lock, or erase it remotely.
- Android: Settings > Security > Find My Device. Ensure it’s toggled on and location services are enabled.
- iPhone: Settings > [Your Name] > Find My > Find My iPhone. Enable all three options: Find My iPhone, Find My Network, and Send Last Location.
I tested this feature the day I set up my new phone. I left it on my kitchen table, opened the Find My app on my tablet, and watched it pinpoint the location within three meters. Knowing it works gives peace of mind.
Configure Automatic Updates
Security patches and bug fixes release regularly. Manual updates get forgotten.
- Android: Settings > Software Update > Auto-download over Wi-Fi. Also enable “Auto-install at scheduled times” if available.
- iPhone: Settings > General > Software Update > Automatic Updates. Toggle on “Download iOS Updates” and “Install iOS Updates.”
I schedule updates for 3 AM when I’m asleep and the phone is charging. Waking up to a fully updated phone feels like free maintenance.
Review App Permissions
New phones grant apps permissions generously during setup. Audit these now before you forget.
| Permission | Should You Grant It? | My Rule |
|---|---|---|
| Location (Always) | Rarely — only maps and Find My Device | Default to “While Using” for everything else |
| Camera | Only camera apps and apps that genuinely need it | Social media gets it; random games don’t |
| Microphone | Voice assistants, recording apps, video calls | If an app asks for mic and I can’t explain why, I deny it |
| Contacts | Messaging, calling, and legitimate social apps only | Games and utilities never get my contacts |
| Storage/Files | File managers, photo editors, document apps | Android 13+ lets you grant access to specific folders — use this |
Go to Settings > Privacy > Permission Manager (Android) or Settings > Privacy & Security (iPhone) to review everything. It takes five minutes and significantly reduces your data exposure.
Day 3: Apps, Organization, and Personalization (45–60 Minutes)
Now the fun part. Your phone works, it’s secure, and it’s time to make it yours.
Download Essential Apps First
Don’t install everything at once. Start with what you actually use daily. Here’s my priority order:
- Communication: WhatsApp, Messages, your email app, video calling (Zoom, Teams, or Meet)
- Finance: Banking apps, payment apps (Google Pay, Apple Pay), budgeting tools
- Navigation: Google Maps, ride-sharing apps if you use them
- Productivity: Calendar, notes, to-do list, cloud storage (Google Drive, iCloud)
- Entertainment: Music, podcasts, video streaming — save these for last
I made the mistake of installing twenty games on day one. My home screen became a mess, and I spent more time organizing than using the phone. Install five apps, organize them, then add more. It’s slower but cleaner.
Organize Your Home Screen
Your home screen is your phone’s dashboard. A cluttered screen wastes time every day.
My system: the bottom dock gets my four most-used apps — Phone, Messages, Chrome, and Camera. The first home screen page gets daily essentials: Calendar, Weather, Email, and Notes. Everything else goes into folders on the second page: Social, Finance, Utilities, Entertainment.
Apps I use less than once a week get buried in the app drawer or deleted. If I haven’t opened an app in a month, it doesn’t deserve home screen space. This sounds strict, but it keeps my phone fast and my mind clear.
📱 My Home Screen Layout
After years of experimenting, I settled on this layout: Dock (4 apps) → Page 1 (8 daily apps) → Page 2 (folders by category) → App drawer (everything else). I can find any app in under three seconds. If you want a deeper dive into digital organization, my guide on organizing apps and files for better productivity explains the psychology behind this system.
Customize Notifications
Notifications are the biggest source of phone distraction. Take control now before bad habits form.
Go to Settings > Notifications and review every app. Ask yourself: “Does this app need to interrupt my day?” Most don’t.
My notification hierarchy:
- Immediate alerts: Calls, texts from family, banking fraud alerts
- Silent notifications: Emails, social media mentions, news updates (these appear in the shade but don’t buzz)
- Blocked entirely: Game promotions, shopping app “deals,” random app reminders
I also set up Focus modes (iPhone) or Do Not Disturb schedules (Android). Work hours: only work apps notify. Sleep hours: only emergency contacts break through. This isn’t about being unreachable — it’s about being reachable on your terms.
Day 4: Data Management and Backup Setup (15–20 Minutes)
Yesterday was about using your phone. Today is about not losing everything if it breaks.
Enable Cloud Backup
This is your safety net. If your phone dies, gets stolen, or falls in a toilet, cloud backup means you don’t lose photos, contacts, messages, or app data.
- Android: Settings > Google > Backup. Toggle “Back up to Google Drive.” Ensure Photos, Contacts, Calendar, and App data are selected. The first backup happens automatically when connected to Wi-Fi and charging.
- iPhone: Settings > [Your Name] > iCloud > iCloud Backup. Toggle it on. Tap “Back Up Now” to force an immediate backup. Ensure Photos, Contacts, Calendars, and Messages are enabled in the iCloud settings above.
Check that your backup completed. On Android, go to Google Drive > Backups and verify your phone appears with a recent timestamp. On iPhone, Settings > [Your Name] > iCloud > iCloud Backup shows the last successful backup time. I check this monthly because I’ve had backups fail silently before.
Configure Photo Storage
Photos consume more storage than any other data type. In 2026, a single photo can be 5MB, and a minute of 4K video is 350MB. Without management, your storage fills in weeks.
Enable “Optimize Storage” (iPhone) or “Storage Saver” (Google Photos on Android). These keep small thumbnails on your phone and full-resolution versions in the cloud. You won’t notice the difference in daily use, but you’ll save gigabytes of space.
I also set Google Photos to back up over Wi-Fi only. My first month with a new phone, I forgot this setting and uploaded 12GB of photos over mobile data. My carrier bill was unpleasant. Now it’s Wi-Fi only, and I manually check the upload status when I’m home.
Day 5: Final Tweaks and Daily Habits (10–15 Minutes)
You’re almost done. These last adjustments make the difference between a phone that works and a phone that works well for you.
Set Up Battery Optimization
New phones have impressive battery life, but bad habits drain it fast. Enable these settings:
- Adaptive Battery (Android): Settings > Battery > Adaptive Battery. The phone learns which apps you use and limits background activity for the rest.
- Optimized Battery Charging (iPhone): Settings > Battery > Battery Health & Charging. The phone learns your charging routine and slows charging past 80% until you typically unplug, reducing battery wear.
- Dark mode: Settings > Display > Dark Mode. On OLED screens, this saves significant battery and is easier on eyes at night.
I charge my phone between 20% and 80% daily. Full charges to 100% and complete drains to 0% stress the battery. My three-year-old iPhone still holds 92% battery health because of this habit. It’s small effort, big payoff.
Enable Emergency Features
Modern phones have built-in emergency tools. Set them up once and hope you never need them.
- Emergency SOS: Press the power button five times rapidly (Android) or hold side button + volume button (iPhone). This calls emergency services and sends your location to emergency contacts.
- Medical ID: Add allergies, blood type, and emergency contacts accessible from the lock screen. First responders can see this without unlocking your phone.
- Emergency contacts: Add at least two people who should be notified if you use Emergency SOS.
I added my wife and my brother. I also included my blood type and allergy to penicillin. It took three minutes and could save my life in a real emergency. My guide on creating a simple family emergency contact plan online covers this in more detail for families.
❤️ Emergency Setup Checklist
Before you call setup complete, verify these: Emergency SOS enabled ✓ | Medical ID filled out ✓ | Two emergency contacts added ✓ | Find My Device tested ✓ | Cloud backup confirmed ✓ | Biometric unlock working ✓ | Automatic updates enabled ✓. Print this list and check each box. I keep a screenshot of my Medical ID on my lock screen as a quick reference.
Common Setup Mistakes I See (And How to Avoid Them)
After helping dozens of people set up phones, these are the mistakes that come up repeatedly:
| Mistake | Why It Happens | How to Fix It |
|---|---|---|
| Skipping 2FA setup | It feels like extra hassle during an already long setup | Use an authenticator app (Google Authenticator or Authy) rather than SMS codes. It’s more secure and works offline. |
| Restoring from a years-old backup | People want “everything back” including forgotten apps | Restore only contacts, photos, and messages. Reinstall apps manually. It’s cleaner and you rediscover what you actually use. |
| Ignoring storage warnings | New phones feel spacious, so people don’t plan | Enable cloud photo backup and storage optimization on day one. Don’t wait for the “Storage Full” panic. |
| Using the same weak password | Memory limits — people reuse passwords everywhere | Set up a password manager (Bitwarden, 1Password, or built-in Google/iCloud Keychain) during setup. Generate unique passwords for every account. |
| Not testing Find My Device | People assume it works because they toggled it on | Actually test it. Leave your phone in another room, open the Find My app on a tablet or computer, and verify it locates accurately. |
When Setup Is “Done”
There’s no real finish line. Your phone evolves as you use it. But after five days of deliberate setup, you’ll have a foundation that lasts.
My final advice: revisit these settings monthly for the first three months. You’ll discover what works and what doesn’t. Maybe you need more notification silencing. Maybe you want a different home screen layout. Maybe you find an app you never use and should delete. This ongoing tuning is what separates a phone that frustrates you from a phone that genuinely helps you.
After three months, I do a quarterly “phone audit.” I check storage, review permissions, update passwords, and clean out apps I haven’t opened. It takes twenty minutes and keeps my phone feeling new. My guide on recovering phone storage after unexpected full warnings covers the cleanup process when things get out of hand.
Setting up a new phone isn’t just about following prompts. It’s about building a tool that fits your life. Take your time, make intentional choices, and don’t be afraid to change things later. The best phone setup is the one you actually maintain.
Frequently Asked Questions
How long does full smartphone setup take?
Plan 2–3 hours spread across 3–5 days. Rushing leads to skipped security steps and poor organization. The data transfer alone takes 20–40 minutes depending on your old phone’s content.
Should I set up as new or restore from backup?
Restore from backup if you’re staying on the same platform (Android → Android, iPhone → iPhone). Set up as new if switching platforms or if your old phone was sluggish — a fresh start often performs better. I restored my last Android phone from backup and it carried over three years of digital clutter. Setting up fresh took longer but the phone felt noticeably faster.
What if my data transfer fails?
Don’t panic. Ensure both phones are charged, use the original cable, and restart both devices. If wireless transfer fails, use a USB cable. If all else fails, sync contacts and photos to Google Drive or iCloud first, then download them manually. My detailed guide on setting up a new smartphone without losing personal data transfer covers troubleshooting every transfer method.
Do I need a screen protector and case immediately?
Yes. Modern phones are expensive to repair. A basic case and tempered glass protector cost under $20 combined and prevent 90% of common damage. I dropped my phone on concrete two weeks after getting it. The screen protector cracked; the actual screen was fine. That $8 protector saved me a $200 repair.
How do I know if my backup is working?
Check manually after the first backup. On Android, open Google Drive > Menu > Backups and verify your phone appears with a recent timestamp. On iPhone, go to Settings > [Your Name] > iCloud > iCloud Backup and check the “Last successful backup” time. Do this weekly for the first month, then monthly.
Can I use my phone while it’s backing up?
Yes, but it slows the process. For the initial backup, let it run overnight while charging and connected to Wi-Fi. Subsequent backups are incremental and much faster.
Related Articles
Continue your smartphone setup journey with these detailed guides from NilansGuide:
- Setting Up a New Smartphone Without Losing Personal Data Transfer — Deep dive into every data transfer method with troubleshooting tips
- First Week With Smartphone Setup Without Confusion — What to do in your first seven days after unboxing
- Essential Mobile Settings You Should Enable Right Now in 2026 — Security and privacy settings beyond the basics
- How to Organize Apps and Files for Better Daily Productivity — Advanced home screen and file organization strategies
- How to Back Up Your Phone Data Safely and Easily — Comprehensive backup strategies for every situation
- How to Free Up Storage Space on Any Smartphone — Cleanup techniques when your phone fills up unexpectedly
- Managing Dual SIM Settings for Work and Personal Use Easily — If you’re using two numbers on one phone
- How I Created a Simple Family Emergency Contact Plan Online — Extend your emergency setup to your whole family
- How to Avoid Phishing Scams on Email and Social Media — Security habits to develop in your first month
- Everyday Tips to Save Battery Life on Your Smartphone — Extend your battery beyond the basic settings
Sources and References
Information in this guide is based on personal testing, manufacturer documentation, and established best practices. Key references include:
- Google. (2026). Android Setup and Transfer Guide. Retrieved from https://support.google.com/android/answer/6193424
- Apple Inc. (2026). Set Up Your iPhone. Retrieved from https://support.apple.com/guide/iphone/set-up-iphone-iph5f977a511/ios
- Google. (2026). Google Account Security and 2-Step Verification. Retrieved from https://support.google.com/accounts/answer/185839
- Apple Inc. (2026). Use Find My on Your iPhone. Retrieved from https://support.apple.com/guide/iphone/locate-a-device-iph09f1f3d5/ios
- Google. (2026). Back Up or Restore Data on Your Android Device. Retrieved from https://support.google.com/android/answer/2819582
- Apple Inc. (2026). Back Up Your iPhone. Retrieved from https://support.apple.com/guide/iphone/back-up-iphone-iph3d2774d2/ios
- Google. (2026). Google Photos Storage Saver. Retrieved from https://support.google.com/photos/answer/6220811
- Apple Inc. (2026). Optimized Battery Charging on iPhone. Retrieved from https://support.apple.com/108021
- Google. (2026). Android Battery Saver and Adaptive Battery. Retrieved from https://support.google.com/android/answer/7665064
- Apple Inc. (2026). Use Emergency SOS on Your iPhone. Retrieved from https://support.apple.com/guide/iphone/use-emergency-sos-iph2a48c2e1/ios
All product names, logos, and brands are property of their respective owners. Use of these names, logos, and brands does not imply endorsement. Setup steps and interface elements may vary slightly depending on your specific device model and software version.
About the Author: Nilan is the creator of NilansGuide.com. He writes practical tech guides tested on real devices — no theory, only steps that actually work. Based in India.
Nilan is the founder of NilansGuide.com and has spent the last 6 years helping friends, family, and readers solve everyday tech problems. He tests every tip and tutorial on his own devices — including a Samsung Galaxy S23, iPhone 15, iPad Air, and Windows 11 laptop — before publishing. When he’s not writing step-by-step guides, he’s usually troubleshooting someone’s “why is my storage full again?” question. Nilan believes technology should work for people, not the other way around.