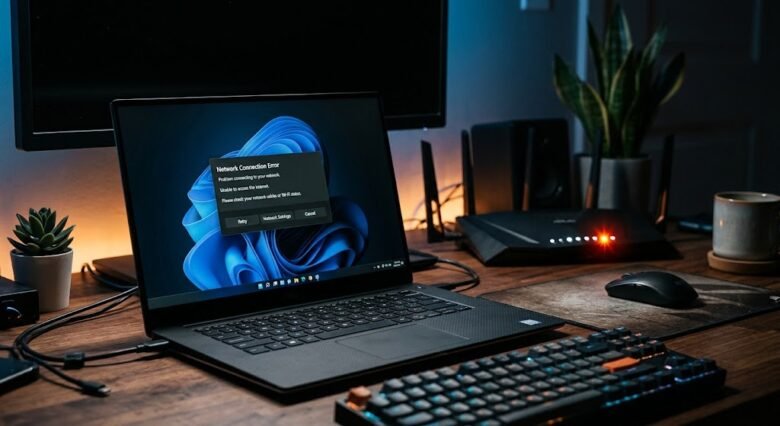
You sit down to join a video call, fire up your laptop, and suddenly your connection drops. Instead of loading your browser, your operating system throws a frustrating and confusing error message at you: “Another device on the network is using your computer’s IP address.” Your Wi-Fi shows as connected, but you have absolutely no internet access.
This error halts your productivity in its tracks. An IP address conflict might sound like a severe cybersecurity issue or a complex routing failure, but it is actually a very common, easily fixable administrative hiccup within your home network.
In this comprehensive troubleshooting guide, we are going to break down exactly why your devices are fighting over the same digital real estate and walk through the most effective, step-by-step methods to permanently resolve IP address conflicts on both Windows and Mac systems.
The Mechanics of an IP Address Conflict
To fix the problem, it helps to understand why it is happening in the first place. Think of your home Wi-Fi router as a digital post office. Every time a device—whether it is your smartphone, a smart TV, a wireless printer, or your laptop—connects to your Wi-Fi, the router assigns it a unique identifier called a local IP address (usually looking something like 192.168.1.15).
This assignment process is handled by a protocol called DHCP (Dynamic Host Configuration Protocol). DHCP ensures that no two devices ever have the same address, allowing data to flow directly to the correct destination.
An IP address conflict occurs when two distinct devices on the same local network end up claiming the exact same IP address. When this happens, the router gets confused. It no longer knows where to send incoming data packets. To prevent network collapse, it simply cuts off internet access to one or both of the conflicting devices.
Why Does the Router Get Confused?
Usually, DHCP works flawlessly in the background. However, conflicts typically arise due to a few specific scenarios:
- The Sleep Mode Glitch: A device (like a laptop) goes into deep sleep mode. The router assumes the device has disconnected and reassigns its IP address to a newly connected smartphone. When the laptop wakes up, it stubbornly tries to use its old IP address, causing an immediate clash.
- Rogue Static IP Addresses: If you manually assigned a static IP address to a device (like a network printer or a gaming console) but forgot to tell the router to exclude that address from its DHCP pool, the router will eventually hand that same address to another device.
- Multiple DHCP Servers: If you are using a secondary router or a Wi-Fi extender that is incorrectly configured, it might be trying to hand out IP addresses at the same time as your main router.
Now that we know the root cause, let’s move on to the fixes, starting with the simplest solutions.
Fix 1: The Quick Router Restart
Before you start typing commands into your terminal or digging through network settings, perform a classic hardware reboot. Your router holds a temporary database of all assigned IP addresses. Sometimes, this database gets corrupted or out of sync.
- Unplug the power cable from the back of your primary Wi-Fi router.
- If you have a separate modem, unplug that as well.
- Wait for a full 60 seconds. This allows the internal capacitors to discharge and clears the temporary memory.
- Plug the modem back in first and wait for the lights to stabilize.
- Plug the router back in.
As the router boots up, it will force all devices in your home to request a brand-new IP address, which completely resets the DHCP table and usually eliminates the conflict instantly.
Fix 2: Release and Renew Your IP Address (Windows)
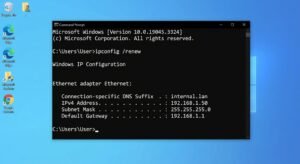
If restarting the router is not an option (perhaps someone else in the house is working), you can force your specific computer to surrender its current IP address and request a new one. On Windows, this is done via the Command Prompt.
- Click the Windows Start Button, type
cmdin the search bar. - Right-click on Command Prompt and select Run as administrator.
- In the black terminal window, type the following command and press Enter:
ipconfig /release - Your internet will immediately disconnect. You will see a few lines of text confirming the address has been released.
- Next, type the following command and press Enter:
ipconfig /renew - Wait a few moments. Your computer is currently negotiating with the router for a fresh, unassigned IP address. Once complete, your connection should be restored.
Fix 3: Renew the DHCP Lease (Mac)
Mac users can achieve the exact same result as the Windows command prompt, but entirely through the graphical user interface. If your MacBook is throwing an IP conflict error, follow these steps:
- Click the Apple Logo in the top left corner of your screen and select System Settings (or System Preferences on older macOS versions).
- Click on Network in the sidebar.
- Select your active connection (usually Wi-Fi) and click the Details or Advanced button.
- Navigate to the TCP/IP tab.
- Click the button labeled Renew DHCP Lease.
- Click OK to apply the changes. Your Mac will drop the conflicted address and grab a new one from the router.
Fix 4: Disable Manual (Static) IP Assignments
If the release/renew trick only fixes the problem temporarily, and the error returns a few days later, you likely have a device hardcoded with a static IP address. You need to ensure your computer is set to obtain its address dynamically.
For Windows:
- Press Win + R to open the Run dialog, type
ncpa.cpl, and hit Enter. This opens your Network Connections. - Right-click your active Wi-Fi or Ethernet adapter and select Properties.
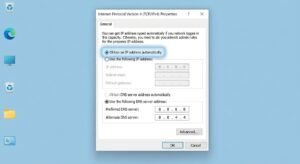
- Scroll down the list, click on Internet Protocol Version 4 (TCP/IPv4), and click the Properties button below it.
- Ensure that “Obtain an IP address automatically” is selected.
- Ensure that “Obtain DNS server address automatically” is also selected.
- Click OK and restart your computer.
For Mac:
- Go back to System Settings > Network > Wi-Fi > Details > TCP/IP.
- Look at the dropdown menu next to Configure IPv4.
- If it says “Manually,” change it to Using DHCP.
- Click OK to save your settings.
Fix 5: Check for Competing DHCP Servers (Advanced)
If your home network has expanded recently and you have added a Wi-Fi range extender, a mesh node, or a second router to boost your signal, you might have accidentally created two DHCP servers. When two different devices are both trying to hand out IP addresses on the same network, chaos ensues.
To fix this, you must log into the admin panel of your secondary router or Wi-Fi extender.
- Find the device’s IP address (usually printed on a sticker on the back, like
192.168.0.254). - Type that address into your web browser and log in.
- Navigate to the Network or LAN settings.
- Locate the DHCP Server toggle and switch it to OFF or Disabled.
- Save your changes.
By disabling the DHCP server on the extender, you force it to act purely as an Access Point. It will passively pass traffic along to your main router, allowing the main router to be the sole authority on assigning IP addresses.
Frequently Asked Questions
Can an IP address conflict be caused by a hacker?
While it is technically possible for someone to maliciously spoof your IP address (a technique known as ARP spoofing), it is incredibly rare on a standard home network. In 99.9% of cases, an IP conflict is just a harmless miscommunication between your router and your own household devices.
Why does my wireless printer keep causing IP conflicts?
Printers are notorious for this. Many users set a “static IP” on their printer so their computers can always find it easily. However, if you don’t tell your router to reserve that specific IP for the printer, the router will eventually give that IP to a phone or tablet. To fix this, log into your router’s admin panel and use the “DHCP Reservation” feature to lock that specific IP to the printer’s MAC address.
Does IPv6 cause IP address conflicts?
It is highly unlikely. IPv6 was specifically designed to solve the limitations of IPv4. Because IPv6 addresses are incredibly long and complex, the chances of two devices accidentally generating or being assigned the exact same IPv6 address on a local network are virtually zero. Conflicts almost exclusively happen on the older IPv4 standard.
Sources & References
To ensure network administration accuracy, the troubleshooting methods in this guide align with documentation from standard networking authorities:
- Cisco Networking Academy: DHCP operation and local area network IP allocation protocols.
- Microsoft Learn: Advanced network adapter troubleshooting and Command Line interface IP configuration.
- Apple Support: Managing TCP/IP and DHCP settings in macOS environments.