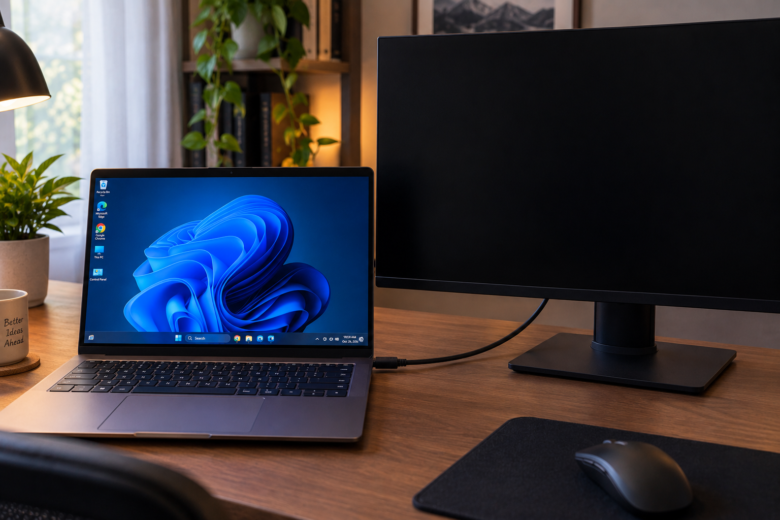
Setting up a dual-monitor workstation is supposed to boost your productivity, not your stress levels. Yet, one of the most common hardware frustrations for Windows 11 users is plugging in a second display, only to be greeted by a stubborn black screen and a “No Signal” message.
Whether you just updated your operating system, swapped out a cable, or bought a brand-new external display, Windows 11 occasionally fails to recognize secondary monitors. The good news? The problem is rarely a dead monitor. More often than not, it is a communication breakdown between your graphics driver, your cables, and the Windows 11 display settings.
Instead of generic advice, this guide walks you through the exact, step-by-step technical fixes to force Windows 11 to detect your second monitor, ranging from basic hardware checks to advanced driver configurations.
1. The Physical Hardware Check (Don’t Skip This)
Before digging into the Windows registry or device manager, we need to rule out physical connectivity issues. A surprisingly high number of “undetected monitor” issues come down to faulty or mismatched hardware.
- Reseat the Cables: Unplug the HDMI, DisplayPort, or USB-C cable from both the monitor and the PC. Wait ten seconds, then plug them back in firmly.
- Check the Input Source: Monitors don’t always auto-detect the active port. Use the physical buttons on your second monitor to navigate its internal menu (OSD). Ensure the input source matches the cable you are using (e.g., switch from HDMI 1 to DisplayPort).
- Test the Cable Integrity: Try swapping the cable with another one. A cable that works fine for a 1080p 60Hz display might not have the bandwidth to push a 4K 144Hz signal, causing Windows 11 to reject the connection entirely.
- Bypass the Hub or Dock: If you are using a USB-C docking station or dongle, unplug the monitor from the hub and plug it directly into your laptop or PC’s dedicated I/O port. Docks frequently overheat or suffer from bandwidth bottlenecking.
2. Force Windows 11 to Detect the Display
Sometimes, the hardware is communicating perfectly, but the Windows 11 operating system simply hasn’t refreshed its display polling. You can manually force the OS to scan for new hardware.
- Right-click on an empty space on your desktop and select Display settings.
- Scroll down to the Multiple displays section.
- Click the downward arrow to expand the menu.
- Click the Detect button.
If Windows finds the display, it will briefly flash and map the screen. If it says, “We didn’t find another display,” move on to the next method.
3. Reset the Projection Mode (Win + P Shortcut)
Windows 11 might actually detect your monitor but is actively choosing not to send a signal to it because of the current projection settings. This frequently happens if you regularly disconnect and reconnect laptops from a desktop setup.
- Press the Windows Key + P on your keyboard simultaneously.
- A flyout menu will appear on the bottom-right corner of your screen.
- You will see four options: PC screen only, Duplicate, Extend, and Second screen only.
- If it is stuck on PC screen only, click on Extend.
This action forces the graphics card to immediately push video output to the secondary port.
4. Update or Roll Back Your Graphics Drivers
Your Graphics Processing Unit (GPU) is the brain behind your multi-monitor setup. If the driver is corrupted, outdated, or if a recent Windows Update installed a generic display driver over your dedicated one, your second monitor will go dark.
How to Update the Driver:
- Right-click the Start Button and select Device Manager.
- Find and expand the Display adapters category.
- You will see your GPU listed here (e.g., NVIDIA GeForce RTX 3060, AMD Radeon, or Intel Iris Xe).
- Right-click your GPU and select Update driver.
- Choose Search automatically for drivers.
How to Roll Back the Driver (If the issue started recently):
If your second monitor stopped working right after a system update, the new driver might be bugged.
- In the Device Manager, right-click your GPU and select Properties.
- Navigate to the Driver tab.
- Click Roll Back Driver (if the button is not grayed out).
- Restart your PC.
Pro Tip: For a completely clean slate, many IT professionals use a free tool called Display Driver Uninstaller (DDU) in Safe Mode to wipe old drivers entirely before installing fresh ones directly from the NVIDIA, AMD, or Intel websites.
5. Fix Refresh Rate Mismatches
If you are mixing a high-refresh-rate gaming monitor (like 144Hz or 240Hz) with a standard 60Hz office monitor, Windows 11 can sometimes struggle to sync the two, resulting in the secondary monitor failing to display an image.
To fix frequency out-of-range errors:
- Open Settings > System > Display.
- Scroll down to the Related settings section and click on Advanced display.
- At the top right, ensure you select your second display from the drop-down menu (if it appears here but not on the desktop).
- Look at the Choose a refresh rate drop-down.
- Lower the refresh rate to 60 Hz.
If the screen instantly turns on, you know it was a bandwidth or frequency limit issue. You can slowly increase the Hz back up until you find the stable limit for your specific cable.
6. Reinstall USB Controllers (For Laptop Users)
If you are using a laptop and connecting your second monitor via a USB-C port, Thunderbolt dock, or DisplayLink adapter, the problem might not be your display drivers at all. The issue could lie with your USB controllers.
When USB root hubs enter a deep sleep state to save battery, they sometimes fail to wake up, leaving your connected monitor without a signal.
- Open Device Manager.
- Scroll down and expand Universal Serial Bus controllers.
- Right-click on USB Root Hub (you may see more than one) and select Uninstall device.
- Do not panic if your mouse or keyboard briefly stops working.
- Restart your computer. Windows 11 will automatically reinstall fresh, working USB controllers upon boot, which often restores the connection to external monitors.
7. Roll Back Recent Windows 11 Updates
Microsoft regularly pushes cumulative updates, and unfortunately, these can occasionally break peripheral compatibility. If your dual-monitor setup worked perfectly yesterday but is broken today, a stealthy background update is likely the culprit.
To remove a problematic update:
- Open Settings > Windows Update.
- Click on Update history.
- Scroll to the bottom and select Uninstall updates.
- Look at the installation dates. Find the most recent update (usually a KB number) that aligns with when your monitor stopped working.
- Click Uninstall next to it, confirm your choice, and reboot your system.
Summary of Troubleshooting Steps
To quickly recap, if you are actively troubleshooting, run through this mental checklist:
- Hardware: Swap the cable, change the monitor input port, bypass any USB docks.
- Software Basics: Use
Win + Pto select Extend, or use the “Detect” button in Display settings. - Deep System: Update GPU drivers, roll back recent Windows updates, and check for refresh rate mismatches.
By systematically isolating the hardware from the software, you can usually bring your second monitor back to life in just a few minutes without needing to replace expensive equipment.
Frequently Asked Questions
Why does my second monitor say “No Signal” but my PC is on?
A “No Signal” message means the monitor has power, but it is not receiving any video data from the computer. This is usually caused by selecting the wrong input source on the monitor’s menu, a damaged HDMI/DisplayPort cable, or an outdated graphics driver preventing Windows from outputting the video feed.
Can a Windows 11 update break my dual monitor setup?
Yes. Cumulative Windows 11 updates sometimes include generic display drivers that overwrite your dedicated graphics drivers (NVIDIA/AMD). This mismatch can cause external displays to drop. Rolling back the driver in Device Manager usually resolves this instantly.
Does it matter which port I plug my second monitor into?
Absolutely. If you have a desktop PC with a dedicated graphics card (installed horizontally lower down on the back of the case), you must plug both monitors directly into the graphics card. Plugging the second monitor into the motherboard’s I/O panel (near the USB ports) will not work unless you have enabled integrated graphics in your BIOS.
Can my laptop support two external monitors at once?
It depends on your laptop’s hardware specifications. While almost all modern laptops support one external monitor via HDMI or USB-C, running two external monitors requires either a Thunderbolt 3/4 port, a graphics card capable of multi-display output, or an active DisplayLink docking station to handle the extra video processing.
Sources & References
- Microsoft Support: Troubleshoot external monitor connections in Windows 11. Reference for standard OS detection methods and projection shortcuts.
- Intel Graphics Support: Identifying and resolving multi-display configuration issues. Reference for refresh rate mismatch limitations and bandwidth troubleshooting.
- VESA Standard Guidelines: Documentation on DisplayPort and HDMI cable bandwidth capabilities and hardware handshake protocols.