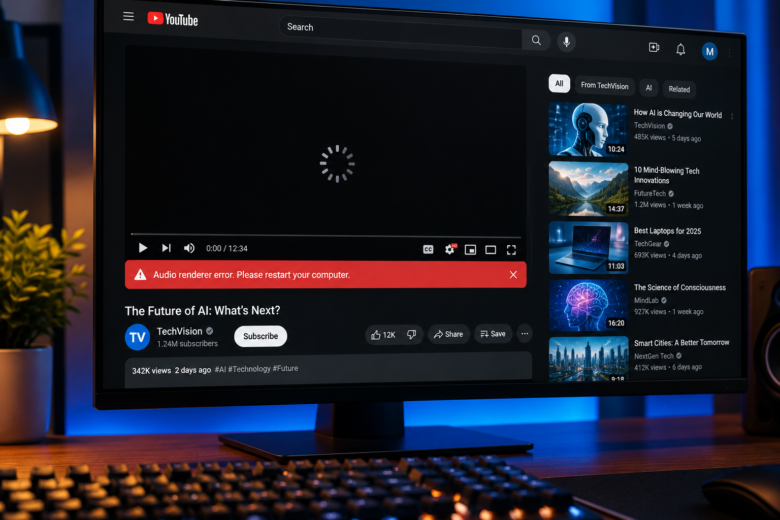
You are right in the middle of a YouTube video, a movie on VLC, or a Spotify playlist when suddenly, the video freezes. The audio cuts out completely. A few seconds later, a highly frustrating message pops up across your screen: “Audio renderer error. Please restart your computer.”
This error is incredibly common on Windows 10 and Windows 11 systems. It usually happens when the software playing your media completely loses communication with your hardware audio device. This miscommunication forces the media player into a panic state, causing the video to freeze because modern browsers synchronize video playback directly to the audio track. If the audio stops, the video stops too.
While the error message explicitly tells you to restart your computer, that is usually a temporary band-aid, not a permanent fix. The error will likely return the next time you plug in a headset or open a new browser tab. Instead of constantly rebooting your machine, follow this detailed progression of fixes to repair the audio rendering pipeline for good.
1. The Immediate Fix: Reset the Physical Connection
Before diving into the Windows registry or downloading new drivers, look at what you just did physically. The “Audio renderer error” is triggered most frequently when you change your audio output device while a video is currently playing.
For example, if you are watching YouTube through your monitor speakers and suddenly plug in a USB headset or connect a pair of Bluetooth earbuds, Windows attempts to hand off the audio stream to the new device. Sometimes, web browsers drop the ball during this hand-off.
How to reset it quickly:
- If you are using wired USB headphones or an external DAC, unplug the USB cable, wait five seconds, and plug it back into a different USB port.
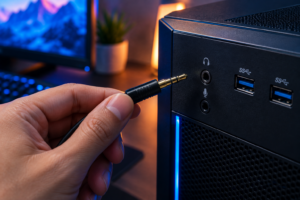
- If you are using a 3.5mm wired headset, pull the jack out of the computer, wait a moment, and firmly push it back in.
- Refresh the web page (F5) or restart the media player application.
In many cases, physically breaking and re-establishing the connection forces Windows to rebuild the audio path, clearing the error instantly without a full system reboot.
2. Jumpstart the Windows Audio Service
If unplugging your device did not work, the core system process that handles all sound on your computer might have crashed in the background. Windows relies on a background service called audiosrv to process sound. If this service freezes, your browser cannot render audio, throwing the exact error you are seeing.
You can manually restart this service without having to restart your entire operating system.
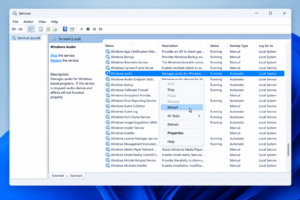
Follow these steps to restart the service:
- Press the Windows Key + R on your keyboard to open the Run dialog box.
- Type
services.mscand press Enter. This opens the Services application. - Scroll down the alphabetical list until you find the service named Windows Audio.
- Right-click on Windows Audio and select Restart from the context menu.
- If it asks you to restart dependent services (like the Windows Audio Endpoint Builder), click Yes.
- Wait a few seconds for the loading bar to finish.
- Go back to YouTube or your media player and refresh the page. Your sound should be completely restored.
3. Disable Exclusive Mode in Sound Properties
Windows has a long-standing feature that allows specific applications to take “exclusive control” of your audio hardware. This is meant to give priority to communication apps like Zoom, Microsoft Teams, or Discord so they sound crystal clear.
However, if Discord takes exclusive control of your headphones, your web browser is completely blocked from using them. When Chrome or Edge tries to play a YouTube video, it finds the audio channel locked, resulting in the renderer error.
How to stop apps from hijacking your audio:
- Press the Windows Key, type Control Panel, and press Enter.
- Change the view in the top right corner to Large icons, then click on Sound.
- In the Playback tab, find your default audio device (the one with the green checkmark). Right-click it and select Properties.
- Navigate to the Advanced tab at the top.
- Under the section labeled “Exclusive Mode,” uncheck the box that says Allow applications to take exclusive control of this device.
- Click Apply, then OK. You will need to refresh your browser or restart your media player for this change to take effect.
4. Turn Off Hardware Acceleration in Your Web Browser
If you only ever see the “Audio renderer error” while using Google Chrome, Microsoft Edge, or Brave, the problem might be tied to how your browser handles video rendering.
Modern browsers use “Hardware Acceleration” to offload the heavy lifting of video decoding from your CPU to your Graphics Card (GPU). While this keeps your computer running smoothly, it can sometimes cause severe desync issues between the audio driver and the graphics driver, leading to playback crashes.
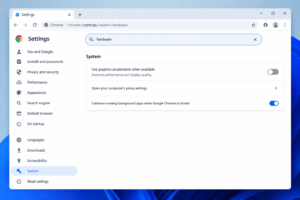
To disable hardware acceleration in Chrome or Edge:
- Open your browser and click the three-dot menu icon in the top right corner.
- Select Settings.
- In the left-hand sidebar, click on System (or search for “Hardware” in the settings search bar).
- Find the toggle labeled Use graphics acceleration when available (or similar wording depending on the browser) and turn it Off.
- A Relaunch button will appear. Click it to restart your browser.
- Test a YouTube video to see if the error returns.
5. Match Your Audio Sample Rate
Audio sample rates define the resolution of the sound your PC outputs. Standard music is usually 44100 Hz, while movies and modern media are often 48000 Hz. If your Windows sound settings are configured to push a bizarre, ultra-high sample rate (like 192000 Hz) to a basic pair of headphones or monitor speakers, the web browser will struggle to render the audio track, eventually giving up and throwing the error.
To ensure maximum compatibility, standardize your sample rate. Go back to the Sound Control Panel (as detailed in Step 3), right-click your default playback device, and select Properties. Go to the Advanced tab. In the “Default Format” dropdown menu, select 16 bit, 48000 Hz (DVD Quality) or 24 bit, 48000 Hz (Studio Quality). Click Apply. These are the most widely supported formats for web media.
6. Uninstall and Reinstall Your Audio Drivers
If you have completed all the software toggles above and the error persists across different apps (VLC, Spotify, Chrome), your audio driver is likely corrupted. This happens frequently after major Windows 11 feature updates, which sometimes aggressively overwrite manufacturer audio drivers with generic ones, breaking the audio path.
How to perform a clean driver wipe:
- Right-click the Windows Start button and select Device Manager.
- Expand the Sound, video and game controllers category.
- Right-click your primary audio device (usually named Realtek High Definition Audio, AMD High Definition Audio, or similar) and select Uninstall device.
- If a checkbox appears asking to “Attempt to remove the driver for this device,” check it, then click Uninstall.
- Restart your computer entirely.
- When Windows boots back up, it will automatically detect the missing hardware and pull a fresh, uncorrupted driver from its database.
If Windows installs a generic driver and your audio still acts up, visit your motherboard manufacturer’s website (Asus, Gigabyte, MSI, Dell), navigate to the support page for your specific computer model, and download the latest verified audio driver directly from them.
Frequently Asked Questions
Why does this error specifically tell me to restart my computer?
The error message is generic. When the audio subsystem in Windows crashes, the web browser has no way to fix the operating system’s internal processes. The browser suggests a restart because a full reboot forces Windows to reload all drivers and services from scratch, which temporarily “fixes” the frozen audio pipeline.
Does a broken ASIO driver cause the Audio Renderer Error?
Yes. If you use professional audio software (like Ableton, FL Studio, or Pro Tools) alongside an external audio interface (like a Focusrite Scarlett), your ASIO drivers might conflict with standard Windows audio. Closing your DAW (Digital Audio Workstation) or ensuring your interface’s sample rate matches the Windows sample rate will usually clear the browser error.
Can an outdated BIOS cause audio rendering issues?
In rare cases, yes. Certain motherboard models (particularly early AM4 and AM5 boards) had known USB dropout issues at the BIOS level. These dropouts would momentarily disconnect USB headsets, triggering the audio renderer error in Windows. Updating your motherboard’s BIOS to the latest stable version resolves these hardware-level connection drops.
Will this error happen if my headphones are broken?
Usually, no. If your headphones have a broken wire, Windows will still process the audio perfectly fine—you just won’t hear anything. The “Audio renderer error” only occurs when there is a software logic failure, a driver crash, or a complete disconnection of the USB/Bluetooth receiver.
Sources & References
- For detailed information on managing background services, see Microsoft’s official Windows Service Management documentation.
- To understand how web browsers handle audio pipelines, refer to the Chromium Project’s Audio Architecture guidelines.
- Always download audio driver updates directly from official manufacturer sites or via Windows Update.