You sit down at your desk, plug your favorite pair of headphones into your PC, and immediately hear it: a low, persistent buzzing, hissing, or crackling sound. It ruins your music, makes gaming incredibly annoying, and turns quiet moments during movies into an irritating experience.
Static noise in PC audio output is an incredibly common problem, and it usually stems from the chaotic electrical environment inside your computer case. Your PC’s motherboard is packed with components drawing massive amounts of power, transferring high-speed data, and generating electromagnetic fields. When your sensitive audio signals pass near these components, they pick up that interference, which your headphones then translate into static.
The fix depends entirely on where the interference is happening. It could be a physical hardware routing issue, a dirty power supply, or a software conflict inside Windows. Instead of guessing, follow this targeted troubleshooting process to permanently silence that background hiss and get clean, crisp audio back.
1. Ditch the Front Panel Audio Jacks
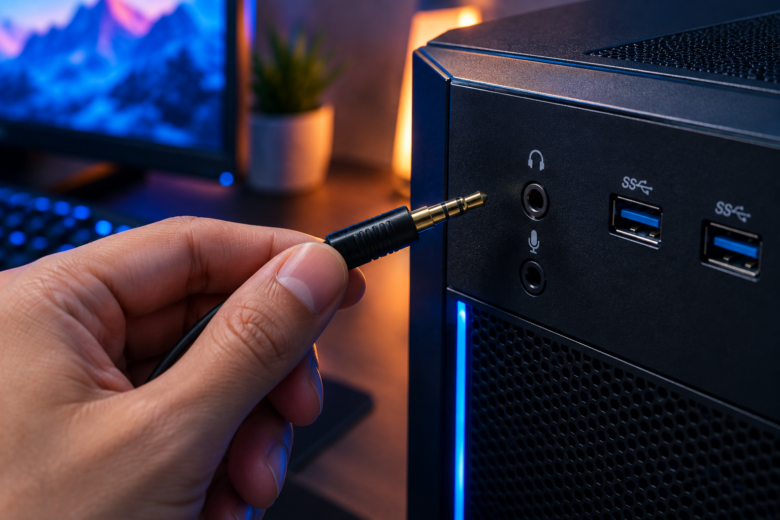
If you are currently plugging your headphones or speakers into the front panel of your PC case, unplug them immediately.
The audio ports on the front of a computer case are connected to the motherboard via a long, thin, and usually unshielded wire that runs right across the inside of your PC. As this wire passes over the power supply, RAM, and graphics card, it acts like an antenna, absorbing electromagnetic interference (EMI).
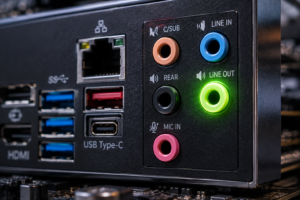
The Fix: Plug your headphones or speakers directly into the green “Line Out” audio jack on the back of your motherboard. These ports are soldered directly to the audio processing chip, meaning the audio signal does not have to travel across a noisy internal cable. For a huge majority of users, simply switching to the rear port completely eliminates background static.
2. Eliminate the Ground Loop
If the static noise sounds less like a high-pitched hiss and more like a low, constant hum or buzz (especially when you run intensive games or software), you are likely dealing with a ground loop.
A ground loop happens when multiple electronic devices in the same setup are connected to power through different grounding paths. For example, if your PC is plugged into one wall outlet, but your powered speakers or audio amplifier are plugged into a different wall outlet or power strip, a slight difference in electrical voltage can occur. This voltage difference travels across the audio cable connecting the two devices, creating a 60Hz hum.
The Fix:
- Power Consolidation: Try plugging your PC, monitor, and speakers into the exact same high-quality surge protector or power strip. This ensures they all share the exact same electrical ground point.
- Use a Ground Loop Isolator: If consolidating power does not work, you can buy a small, inexpensive device called a Ground Loop Isolator. It plugs in directly between your PC and your speakers/headphones. It uses small internal transformers to physically separate the electrical connection while still allowing the audio signal to pass through, instantly killing the hum.
3. Match the Windows Audio Sample Rate
Sometimes the static or crackling is not electrical at all, but rather a software processing error. Windows has to convert digital data into an analog signal for your headphones. If Windows is trying to push an ultra-high-resolution audio format to a basic audio chip that cannot handle it, the chip will drop data packets, resulting in loud pops and crackles.
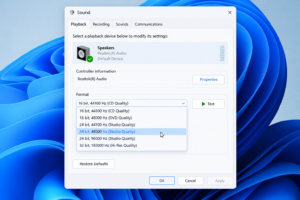
How to adjust your sample rate:
- Press the Windows Key, type Control Panel, and press Enter.
- Change the view to “Large icons” in the top right, then click on Sound.
- In the Playback tab, find your active output device (usually named “Speakers” or “Realtek Audio” with a green checkmark). Right-click it and select Properties.
- Navigate to the Advanced tab.
- Under the “Default Format” dropdown, change the setting to 24 bit, 48000 Hz (Studio Quality). This is the industry standard for modern media.
- Click Apply. Play some music to test if the crackling has stopped. If it persists, try stepping it down to 16 bit, 44100 Hz (CD Quality).
4. Disable Conflicting Audio Enhancements
Windows 11 and audio drivers (like Realtek) come packed with digital enhancements: spatial audio, bass boost, loudness equalization, and room correction. While these sound good on paper, they require real-time processing. If your CPU spikes, or if two different software programs are trying to apply enhancements at the same time, the audio will clip and create static.
To rule this out, go right back to the same Advanced tab in the Sound Properties window mentioned in the previous step. Uncheck the box that says “Enable audio enhancements” (or in some versions, go to the Enhancements tab and check “Disable all enhancements”). Click Apply and OK. If you use third-party equalizer software like Nahimic, Waves MaxxAudio, or Dolby Atmos, disable them temporarily to see if the static clears up.
5. Stop USB Power Suspension (For USB Headsets/DACs)
If you are using a USB headset or an external USB audio interface (DAC), your static issues might be tied to Windows power management. By default, Windows uses a feature called “USB Selective Suspend” to cut power to USB ports it thinks are inactive, saving electricity.
Unfortunately, Windows sometimes mistakenly throttles power to USB audio devices while they are operating, causing robotic sounds, stutters, and electronic clicking.
How to disable this feature:
- Open the Start menu, type Edit power plan, and hit Enter.
- Click the link that says Change advanced power settings.
- In the new window, scroll down and click the plus (+) sign next to USB settings, then expand USB selective suspend setting.
- Change the setting to Disabled.
- Click Apply, then OK.
6. The Driver Rollback Trick
Audio drivers are notoriously temperamental. Updating to the latest driver is usually good advice, but motherboard manufacturers occasionally release buggy Realtek drivers that introduce static.
If updating your audio driver through Device Manager hasn’t worked, the best fix is often forcing Windows to use its own generic, universally stable driver instead of the manufacturer’s specific driver.
- Right-click the Windows Start button and select Device Manager.
- Expand Sound, video and game controllers.
- Right-click your main audio device (e.g., Realtek High Definition Audio) and select Update driver.
- Click Browse my computer for drivers, then click Let me pick from a list of available drivers on my computer.
- Look for High Definition Audio Device (this is the Microsoft generic driver). Select it, click Next, and confirm the installation.
- Restart your computer. This strips away bloatware and often results in a perfectly clean audio signal.
7. The Ultimate Hardware Fix: Buy an External DAC
If you have tried every software fix, changed ports, and bought new cables, but the static is still there, you have a hardware limitation. Some motherboards simply have cheap, poorly isolated audio components. The electromagnetic interference from your graphics card (especially during gaming) is bleeding directly into the onboard audio chip.
The ultimate, guaranteed fix is to bypass the internal motherboard audio entirely. You can do this by purchasing an external DAC (Digital-to-Analog Converter). A DAC plugs into your PC via a USB cable. Because the actual conversion of the audio from digital data to analog sound happens outside the noisy computer case, the signal remains crystal clear. Even an entry-level $30 USB DAC or Apple’s simple USB-C to 3.5mm dongle adapter can provide a massive upgrade in clarity over a noisy motherboard port.
Frequently Asked Questions
Why do I only hear static when playing high-end PC games?
This is almost always caused by GPU coil whine or electromagnetic interference. When a game pushes your graphics card to render hundreds of frames per second, the card draws massive power and generates a strong electromagnetic field. This field bleeds into the motherboard’s audio traces. Using a USB DAC or a wireless headset completely bypasses this issue.
Can a damaged 3.5mm cable cause static noise?
Yes. Inside a standard 3.5mm audio cable are tiny copper wires carrying the left channel, right channel, and ground. If the cable is bent, crushed by a chair wheel, or frayed internally, those wires can short out against each other or lose their shielding, introducing static whenever the cable moves.
Will upgrading my power supply (PSU) fix audio hum?
It can, but it is a drastic step. A cheap, low-tier power supply can introduce “ripple” (unclean voltage) into the motherboard, which the audio components pick up as a buzz. However, before replacing your PSU, try a $10 Ground Loop Isolator first, as it solves the same electrical symptoms much cheaper.
Is static noise harmful to my headphones?
General background hiss or a low ground loop hum will not damage your headphones or speakers; it is just incredibly annoying to listen to. However, loud, sudden “pops” or sharp crackling sounds caused by driver crashes can potentially damage speaker drivers over a long period if played at maximum volume.
Sources & References
- For deeper guidance on power management and USB device connectivity, consult Microsoft’s official Windows 11 hardware documentation.
- Learn more about the physics of audio interference and ground loops from audio engineering resources like Sound On Sound.
- Always verify your specific motherboard’s audio chipset capabilities by visiting the manufacturer’s official support page (e.g., ASUS, MSI, Gigabyte) before installing third-party audio software.